Use Case #1: Find and Download Data Associated With a Selected Study
In this use case, we’ll demonstrate how to select and download processed genomic variant, RNA-seq, and associated annotation files from the Mayo Clinic AD Cerebral Amyloid Angiopathy study (MC-CAA), which was generated as part of the M2OVE-AD program.
It is important to note upfront that the data collected in this specific study are from humans and are therefore considered controlled access data. This requires the submission of a Data Use Certificate. You should make sure to understand the portal’s data conditions for use before reading this use case. Learn all about these conditions for use here.
When accessing controlled access data, ensure you have a secure work environment, such as provisioning a cloud computing instance instead of downloading to a local computer.
Please note that this page outlines the potential steps that you may take to find the data of interest—this is not the only way to do this, as the portal offers multiple methods for filtering data. You can find information and instructions on all of these methods here.
Also, any numbers you see throughout screenshots on this page may be different from numbers currently reflected in the portal.
Here are the steps that you might take in this scenario:
Log into the portal.
In the AD Knowledge Portal, click on the Explore tab, followed by the Data subtab.
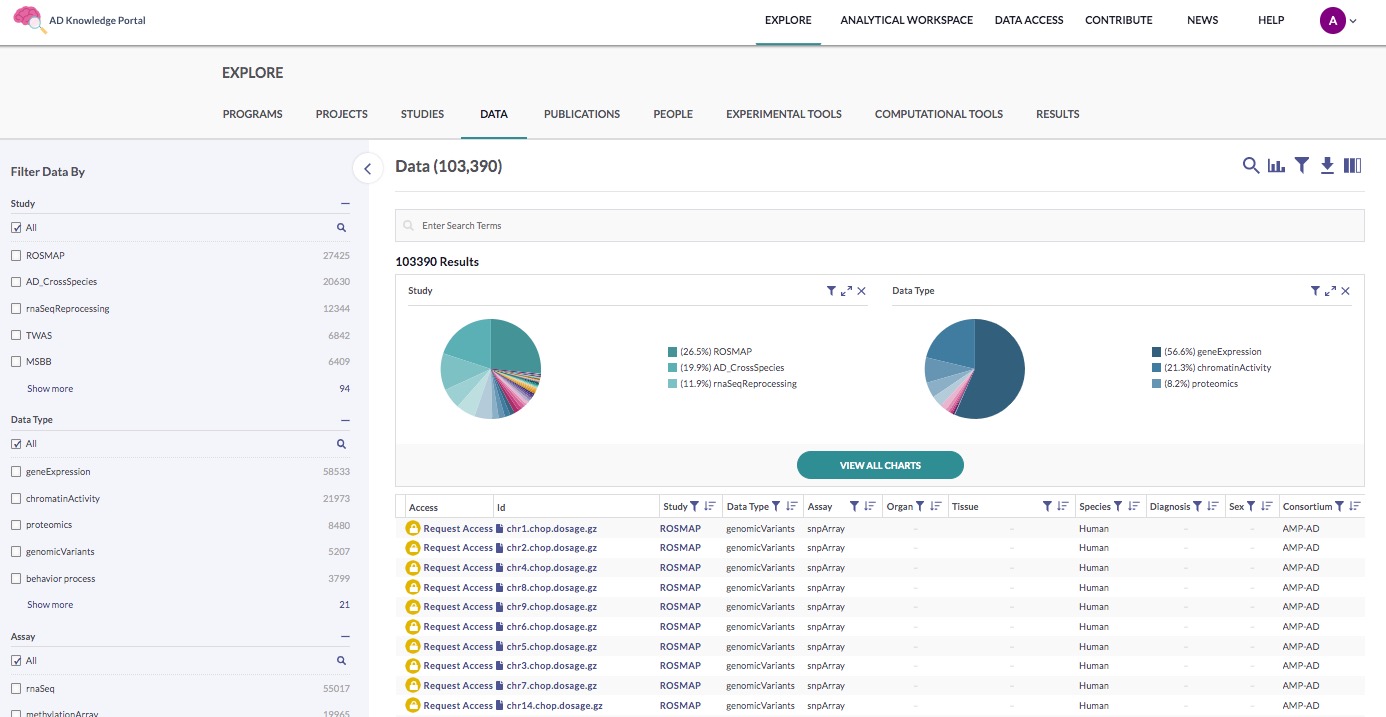
Use the search function to find the files associated with MC-CAA:
Click the magnifying glass icon in the main section
Ensure that Study is selected from the available Search in Field options
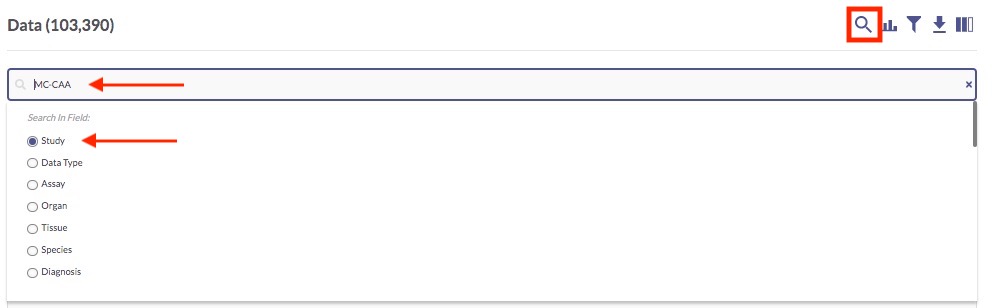
Type “MC-CAA” into the search box and click Enter
The following image reflects what the page will look like once the MC-CAA Study filter has been applied.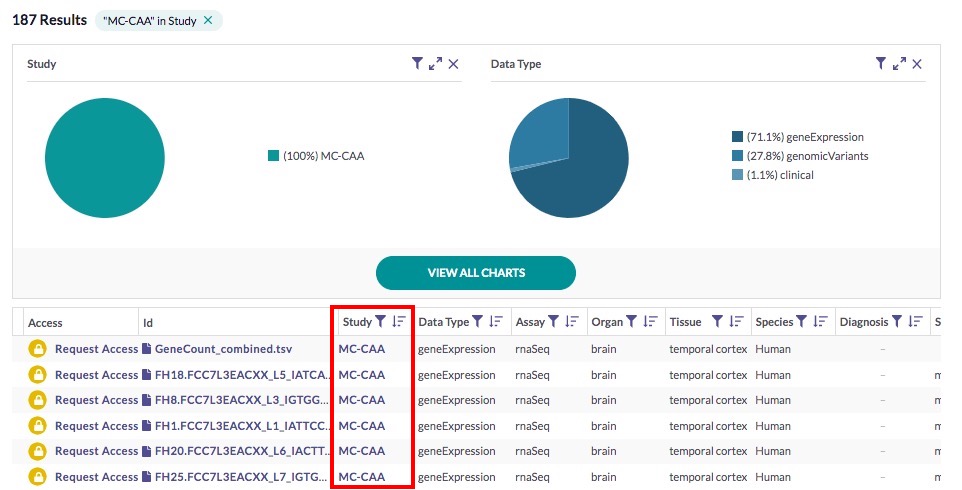
In the Study column, you can click any of the MC-CAA links to visit the Study Details page for that study, which presents information about the study goals, subject selection criteria, and methodological details of the biological assays used, as well as lists of metadata and data associated with the study. You can actually download data and metadata files from the Study Details page, if you want.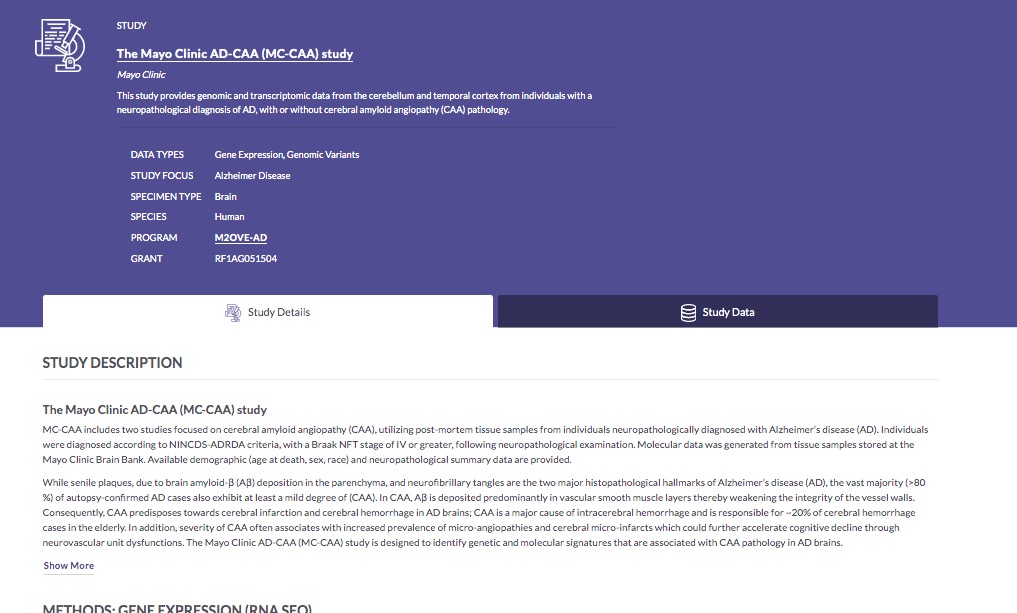
Back in the data table, notice the Access column.
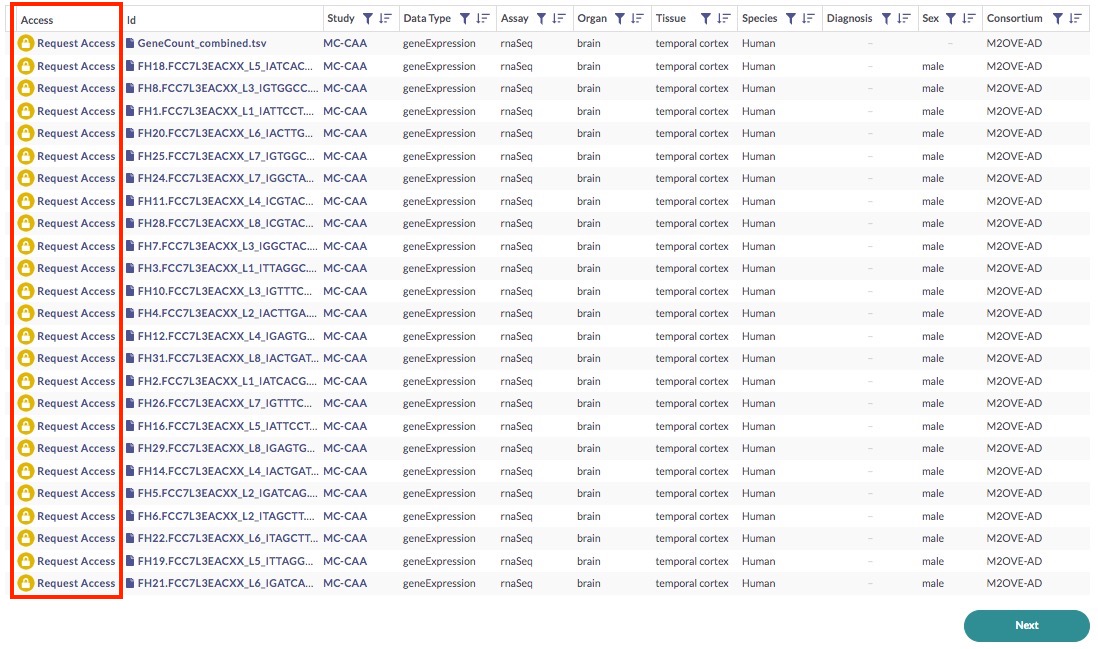
In order to gain access to these files, you need to first request access. Click on any of the Request Access links, which will bring up a popup window—follow the prompts in order to request access (find more information on this here). The governance team will review your request and notify you if and when your request is approved.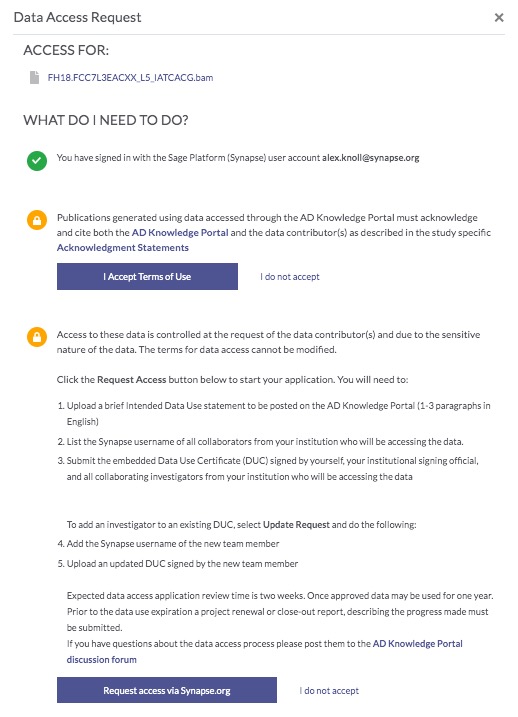
If and when your request for access has been approved, the Access column in the data table will now say View Terms Instead of Request Access.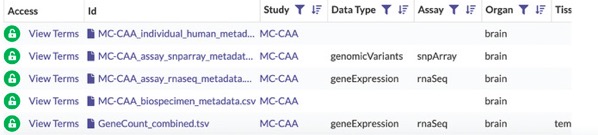
⚠ Remember, when accessing controlled access data, ensure you have a secure work environment, such as provisioning a cloud computing instance instead of downloading to a local computer. Learn about Synapse conditions for use here.Now, you can use additional filters to find specific files of interest using the Filter Data By section on the left (for a refresher on how to use this section, visit this page).
For this use case, we want to locate the Data Subtype filter section and check the Processed box, as seen in the image below.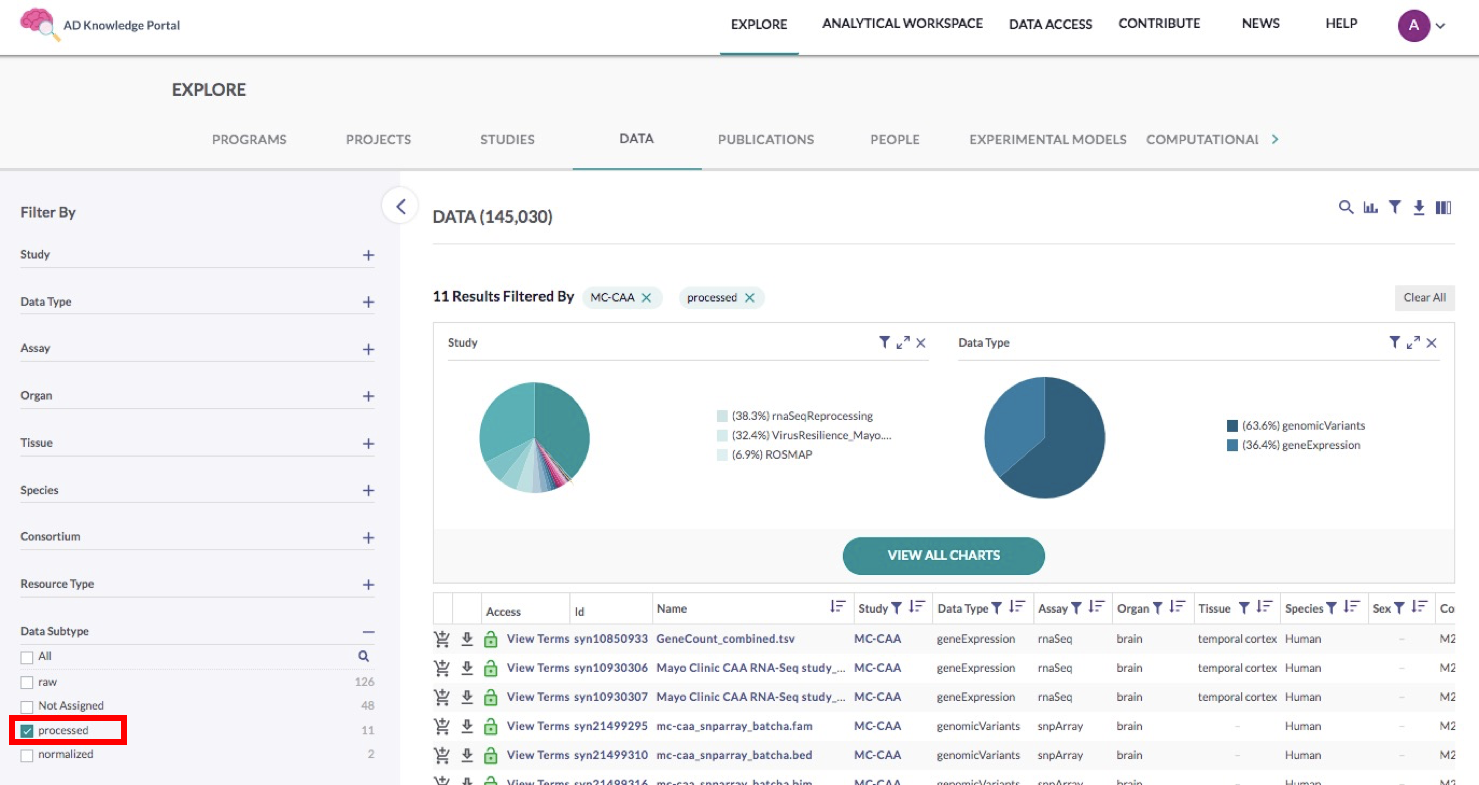
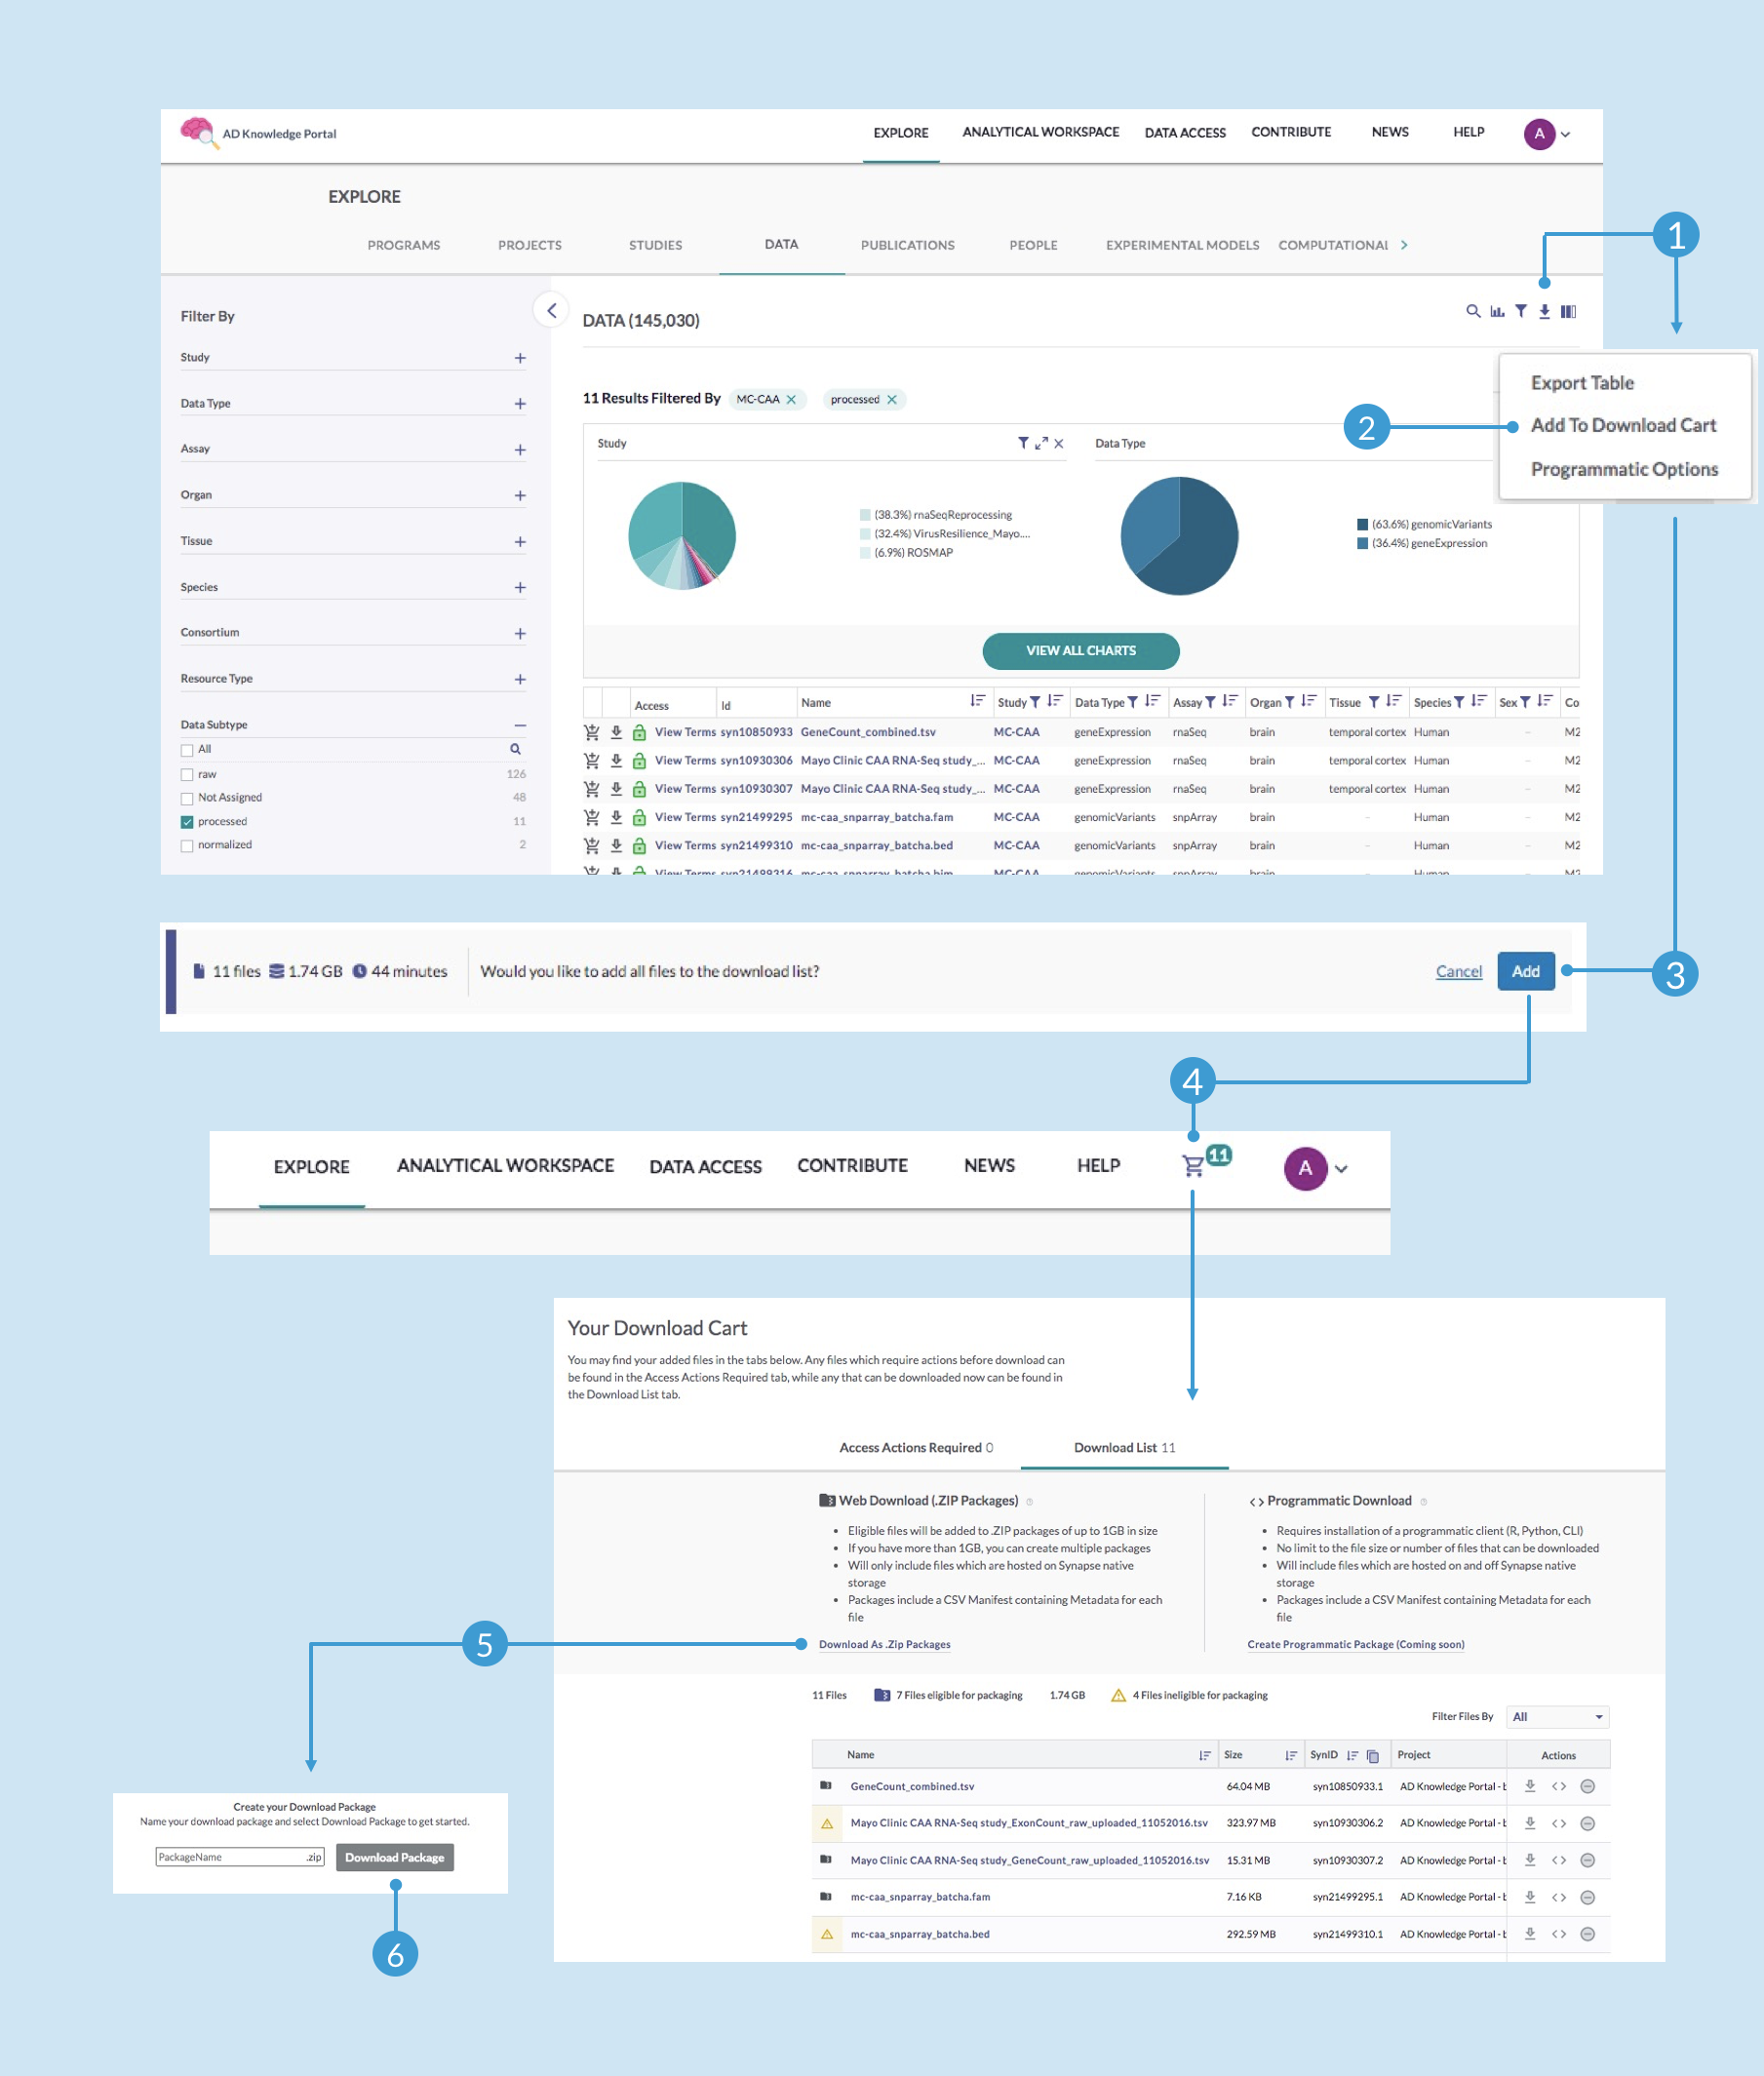
In this example, we are selecting processed RNA-seq gene count matrices and genomic variant PLINK files. While beginning analysis with unmanipulated gene counts (as designated by the “processed” annotation) is often preferred, you may instead check the value “normalized” to find the RNA-seq gene counts normalized by conditional quantile normalization (CQN).Once you have narrowed down the data table to only the files you are interested in, you’re ready to download. Use the labelled images below as reference while following these next steps.
Click the Download Options icon (1) above the visualization section and select Add to Download Cart (2) from the dropdown menu (if you are not already signed in at this point, you will be prompted to do so)
Notice that this brings up a new notification that displays the number and size of files you have selected—click Add (3) to confirm that you want to add all files to the download list
Once your files are ready to download, you should see a shopping cart icon at the top right, which will indicate how many files are currently in your download list—click on that icon (4)
In your download cart, you can review all files in the list, including those that are eligible or ineligible for packaging. You are welcome to individually download any of the ineligible files using the download icon in that file’s Action column. To download the eligible files as a zipped package, click Download As .Zip Packages (5)
Enter a name for your zipped file and click Download Package (6)
⚠ Before downloading any data onto your computer, ensure that your work environment is secure and that you understand how to manage data that may contain private health information (PHI).
⚠ Note that there is a limitation on the number and size of files that can be downloaded through the web—for alternative programmatic download options, see Use Case #2: Download Files in Bulk Using the Command Line Client.
Finally, you need to download the file annotations, which are required for interpreting the data files.
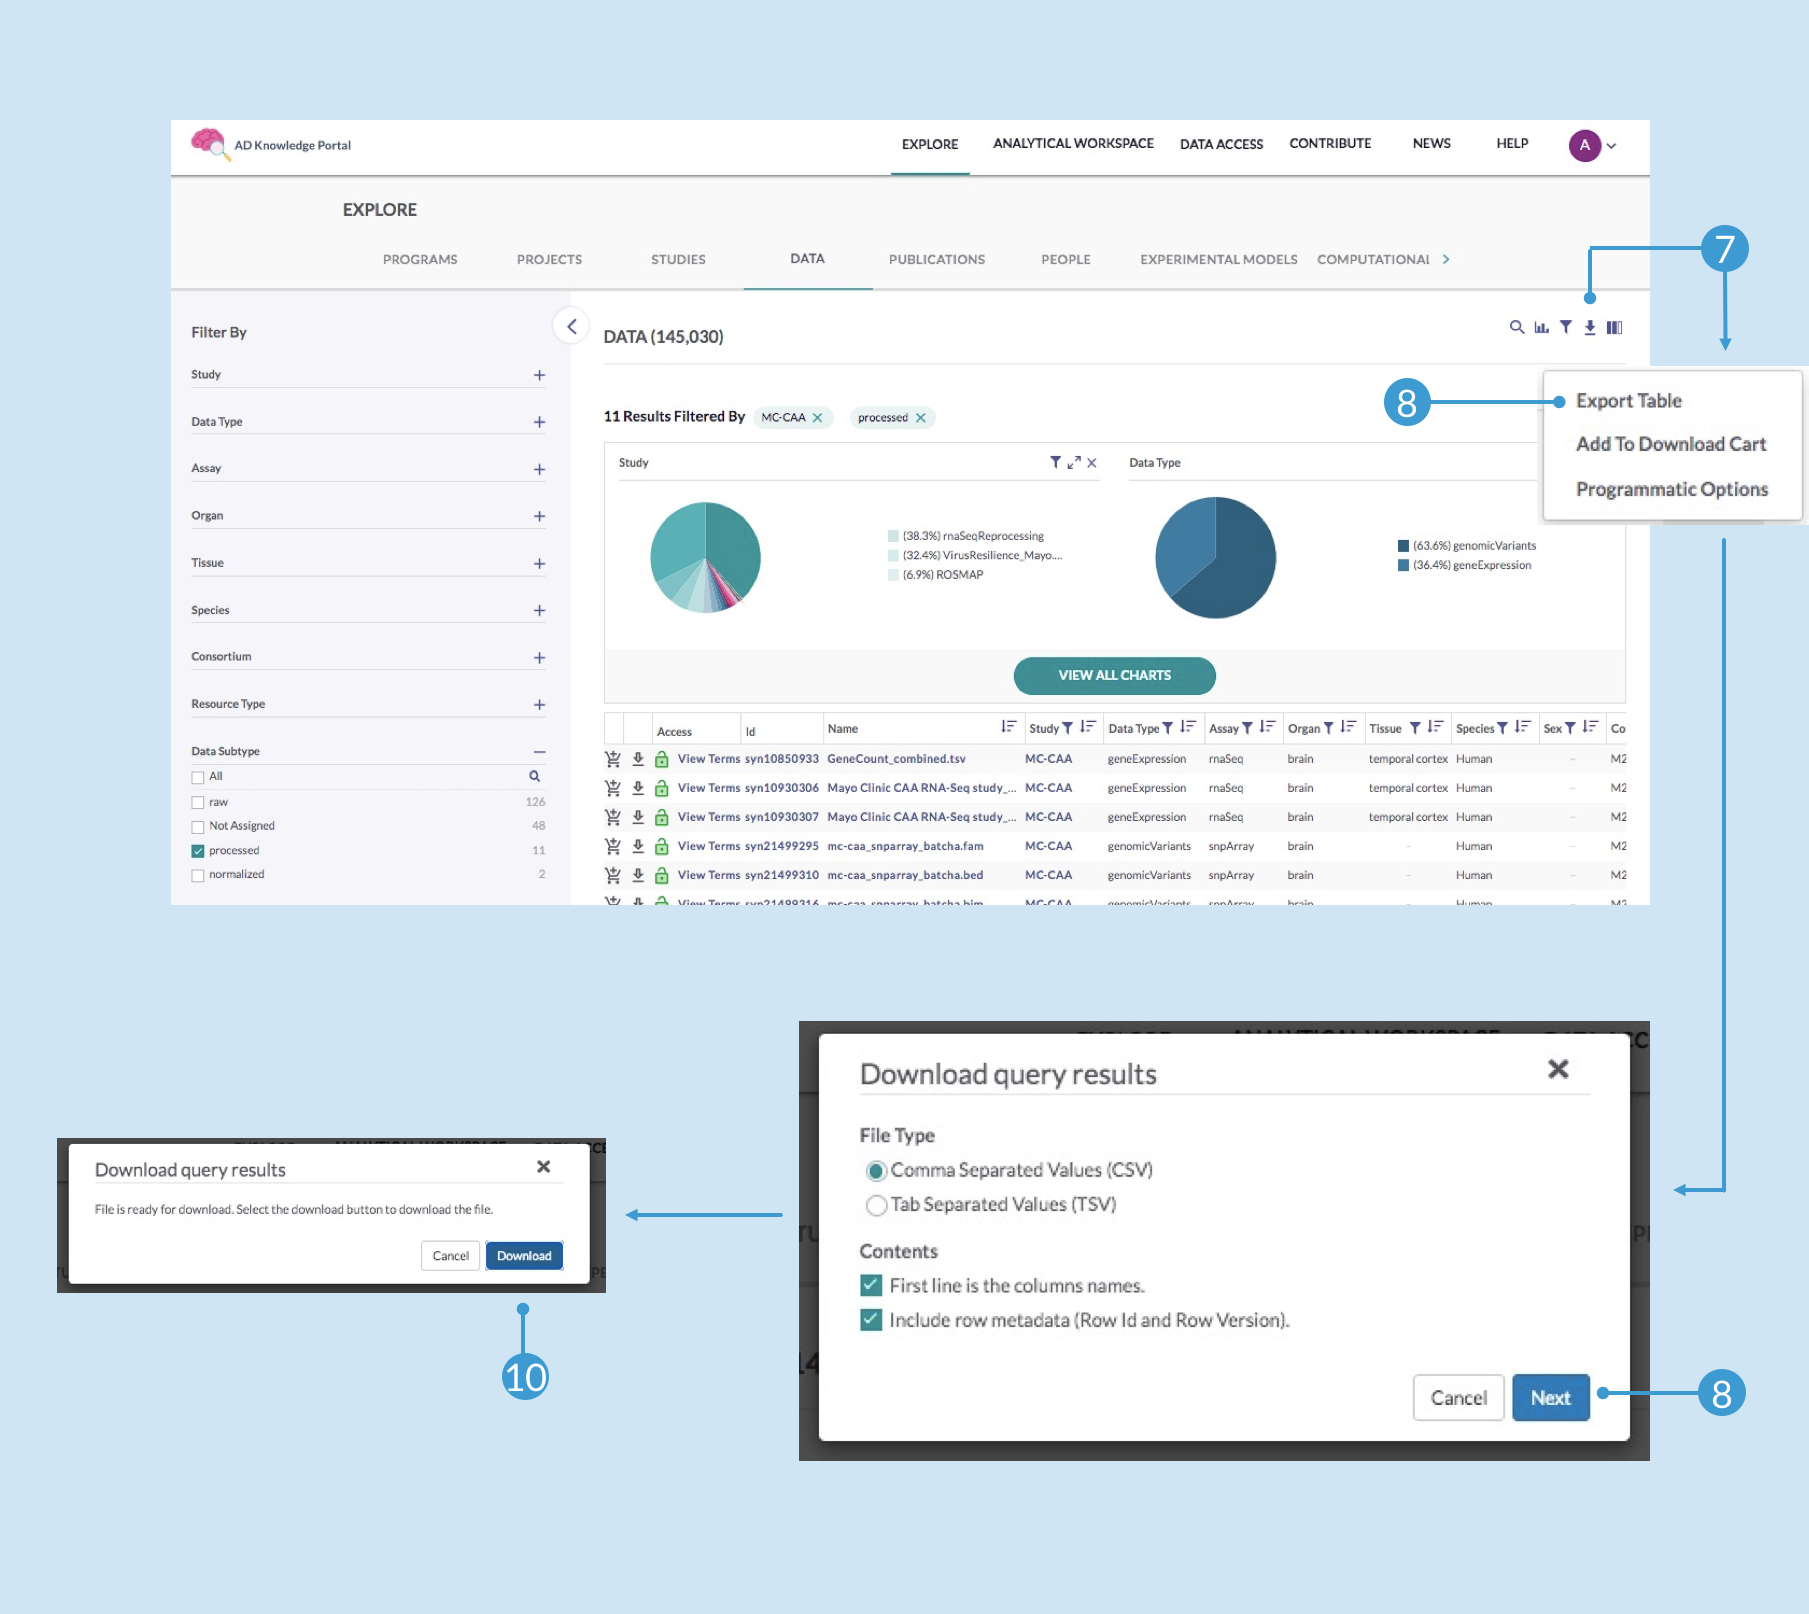
To download the file annotations:Click back on your browser to return to the Explore page where you had your data filtered (the filters should still be in place), and click the download icon again (7), and this time click Export Table (8)
In the Download query results popup window, customize the File Type and Contents sections as desired and click Next (9)
The resulting popup window should let you know the file is ready for download—click Download (10)
Once you have downloaded the study data and file annotations, you may want to also download the associated metadata files. For a breakdown of how to do this, including how to join metadata files and combine them with the data, see Use Case #3: Accessing and Joining Metadata Files With Data.